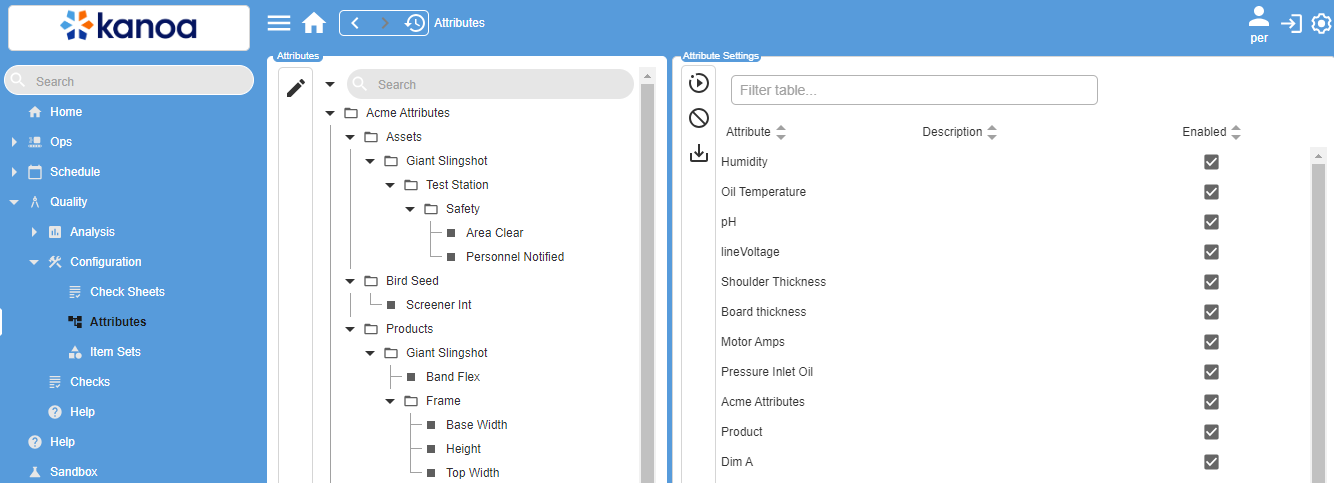
Attributes
Whenever a check is to be compared against a specification that is dependent upon the asset, that check needs to reference an attribute. Any check type can have an attribute associated to it. Attributes and associated specifications can be configured in Quality > Configuration > Attributes.
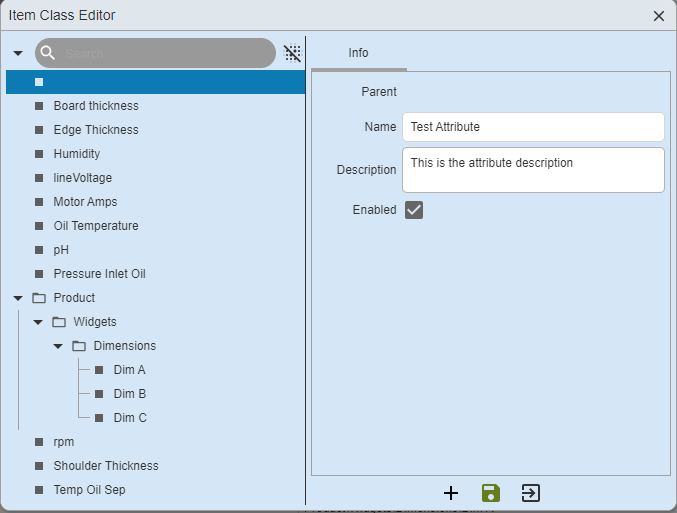
Adding Attribute
Assets can be added and edited by clicking the
Edit Attribute button on the left view. This will open the Attribute Editor popup.Attributes are organized in a hierarchy based on their assignment within a parent attribute. To create a new attribute, first select its intended parent attribute from the attribute tree on the left. Click the
icon, which clears the form for the addition of a new attribute. If no parent attribute is assigned, it will reside at the top level.Each attribute requires a name. Attribute names do not need to be unique. In fact, identical names should be used such as ‘Dryer Temperature’ for comparison of similar attributes across assets. However, attribute name and asset combinations must be unique.
The form provides additional fields to add a description or Enable/Disable the attribute. Click the Save button after creating or editing an attribute.
Attributes can be deleted from the main Attributes screen by selecting an attribute and clicking the
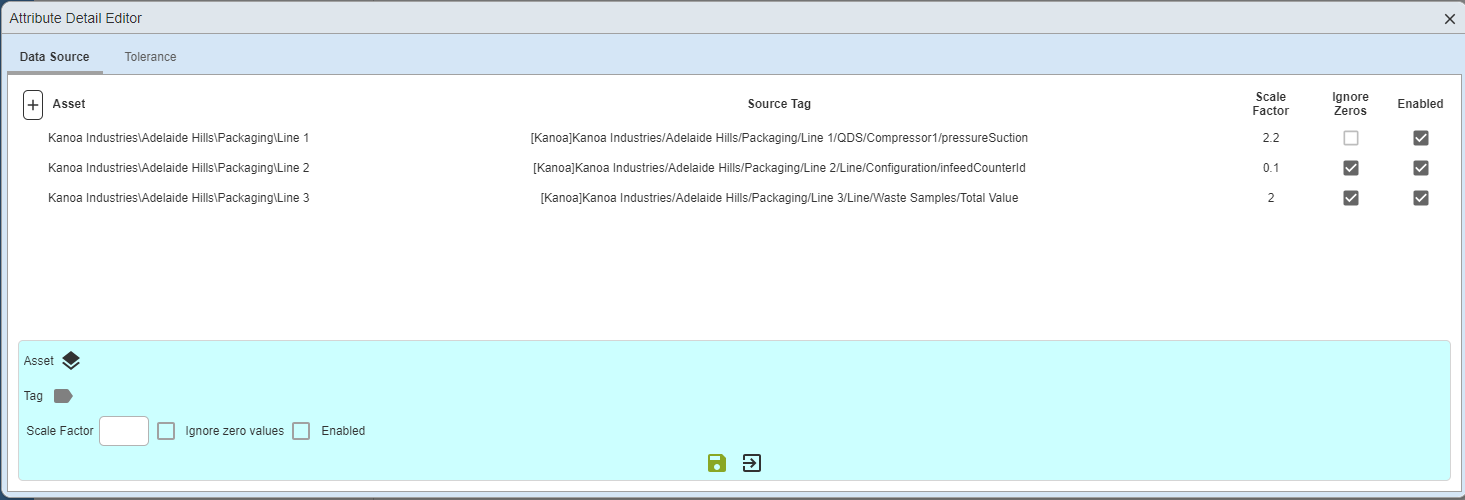
Delete Attribute button. Click OK when the deletion confirmation popup opens. To configure attribute settings, such as data source or tolerances, select the attribute from the table on the right. Then, click the View Attribute Settings button. If you have security privileges, the fields can be edited from this popup. Otherwise, the Attribute Detail Editor will be in a view only mode.Data Sources
If the value for the attribute can be pulled directly from an asset, configure the Data Source settings. To add a new data source, click the
Add Data Source button on the left.Use the Asset Selector and Tag Browser to select the tag. Scale Factor and Ignore zero values parameters are specific to tag collector values, scaling the PLC value and preventing the storage of zero values if not required. Use the Enabled checkbox to enable or disable a data source.
Tolerances
One or more specifications (or tolerances) can be added to an attribute. A tolerance can be applied to all items by leaving the Asset, Item and Item Set fields blank. Otherwise, the Asset and Item selectors can be used to set tolerances by individual item, asset or item set. To add a new tolerance, click the
Add Tolerance button on the left of the Tolerance tab.When a check is to be taken, it will first check if a tolerance exists for the current item. If no tolerance is found, it will check if the current item belongs to an item set that has a tolerance. If no item set tolerance has been configured, it will use the tolerance defined for all items.
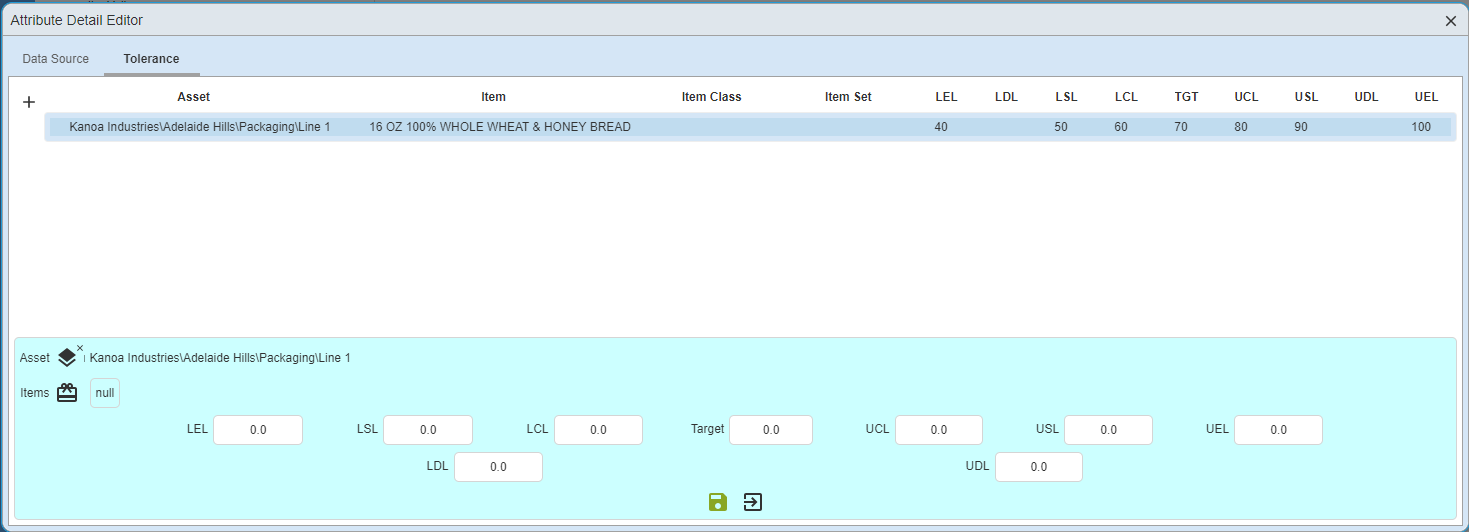
Tolerance Parameters
- LEL Lower Entry Limit: Defines the minimum value that can be entered.
- LSL Lower Spec Limit: Defines the lower Pass / Fail condition. Failing values will be highlighted red.
- LCL Lower Control Limit: Defines the lower limit condition. Values below the LCL will be considered as passing but will be highlighted orange.
- Target: Defines the expected ideal value
- UCL Upper Control Limit: Defines the upper limit condition. Values exceeding the UCL will be considered as passing but will be highlighted orange.
- USL - Upper Spec Limit: Defines the upper Pass / Fail condition. Failing values will be highlighted red.
- UEL - Upper Entry Limit: Defines the maximum value that can be entered.
Tolerance parameter values must make logical sense or will be highlighted in red as a warning. For instance, the Upper Entry Limit cannot be smaller than the Lower Entry Limit.