Materials
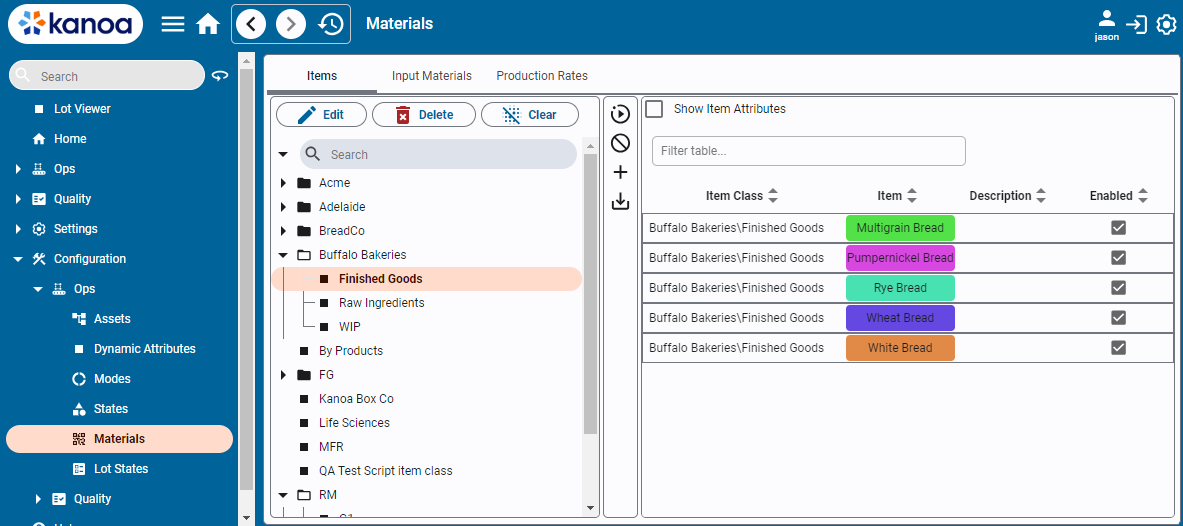
The Materials Management page allows you to manage the materials used in the production of your products. Primarily, it is used to define the materials or products that can be produced by your assets and the expected rate at which they should be produced. It can also be used to manage the raw materials that are consumed in the production of sub-assemblies and finished goods.
- Items can be created through this screen, via script functions, web services, or ERP/PLM middleware tables.
- Items can be categorized into classes and sub-classes.
- Custom Attributes can be added to items to store any type of information about an item.
💡 Note: We call materials 'items' in our application.

Item Classes
Item Classes are a way of categorizing items. Consider it a folder structure. An important thing to note is that categorizing items can be important particularly with Kanoa Quality as it provides a way to set specifications for an entire item class rather than each individual item.
To edit Item Classes, click the button.
Item Attributes
Metadata about an item can be stored against an item in the custom attribute tabs. This provides a method for storing any type of data against that item. You can create any attribute by typing its name and selecting 'Create'. Once an attribute has been created, it will be available for other items.
The 'Show Item Attributes' checkbox will add attribute columns to the table.
Configuring Items
Items can be added by clicking on the button or edited by selecting an item and pressing the
button.
Delete an item by clicking on the
button.
💡 Note: Items that have been used in historical production runs cannot be deleted but will be disabled.

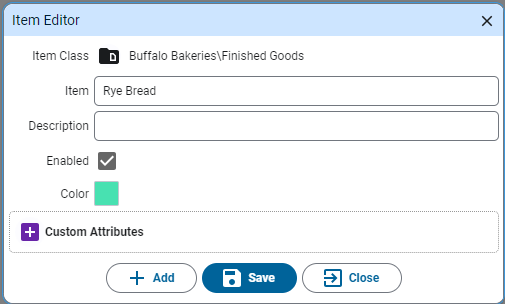
- Item Class: Select the Item Class this item belongs to.
- Item Name: Enter the item name. Item names must be unique.
- Description: Add an optional description about this item.
- Enabled: Indicates if the item is enabled. Disabled items cannot be selected.
- Color: Select a color for this item. Color coding can be useful when scheduling like products together because it can reduce the changeover time between production runs. If no color is selected, the item class color will be shown.
Input Materials
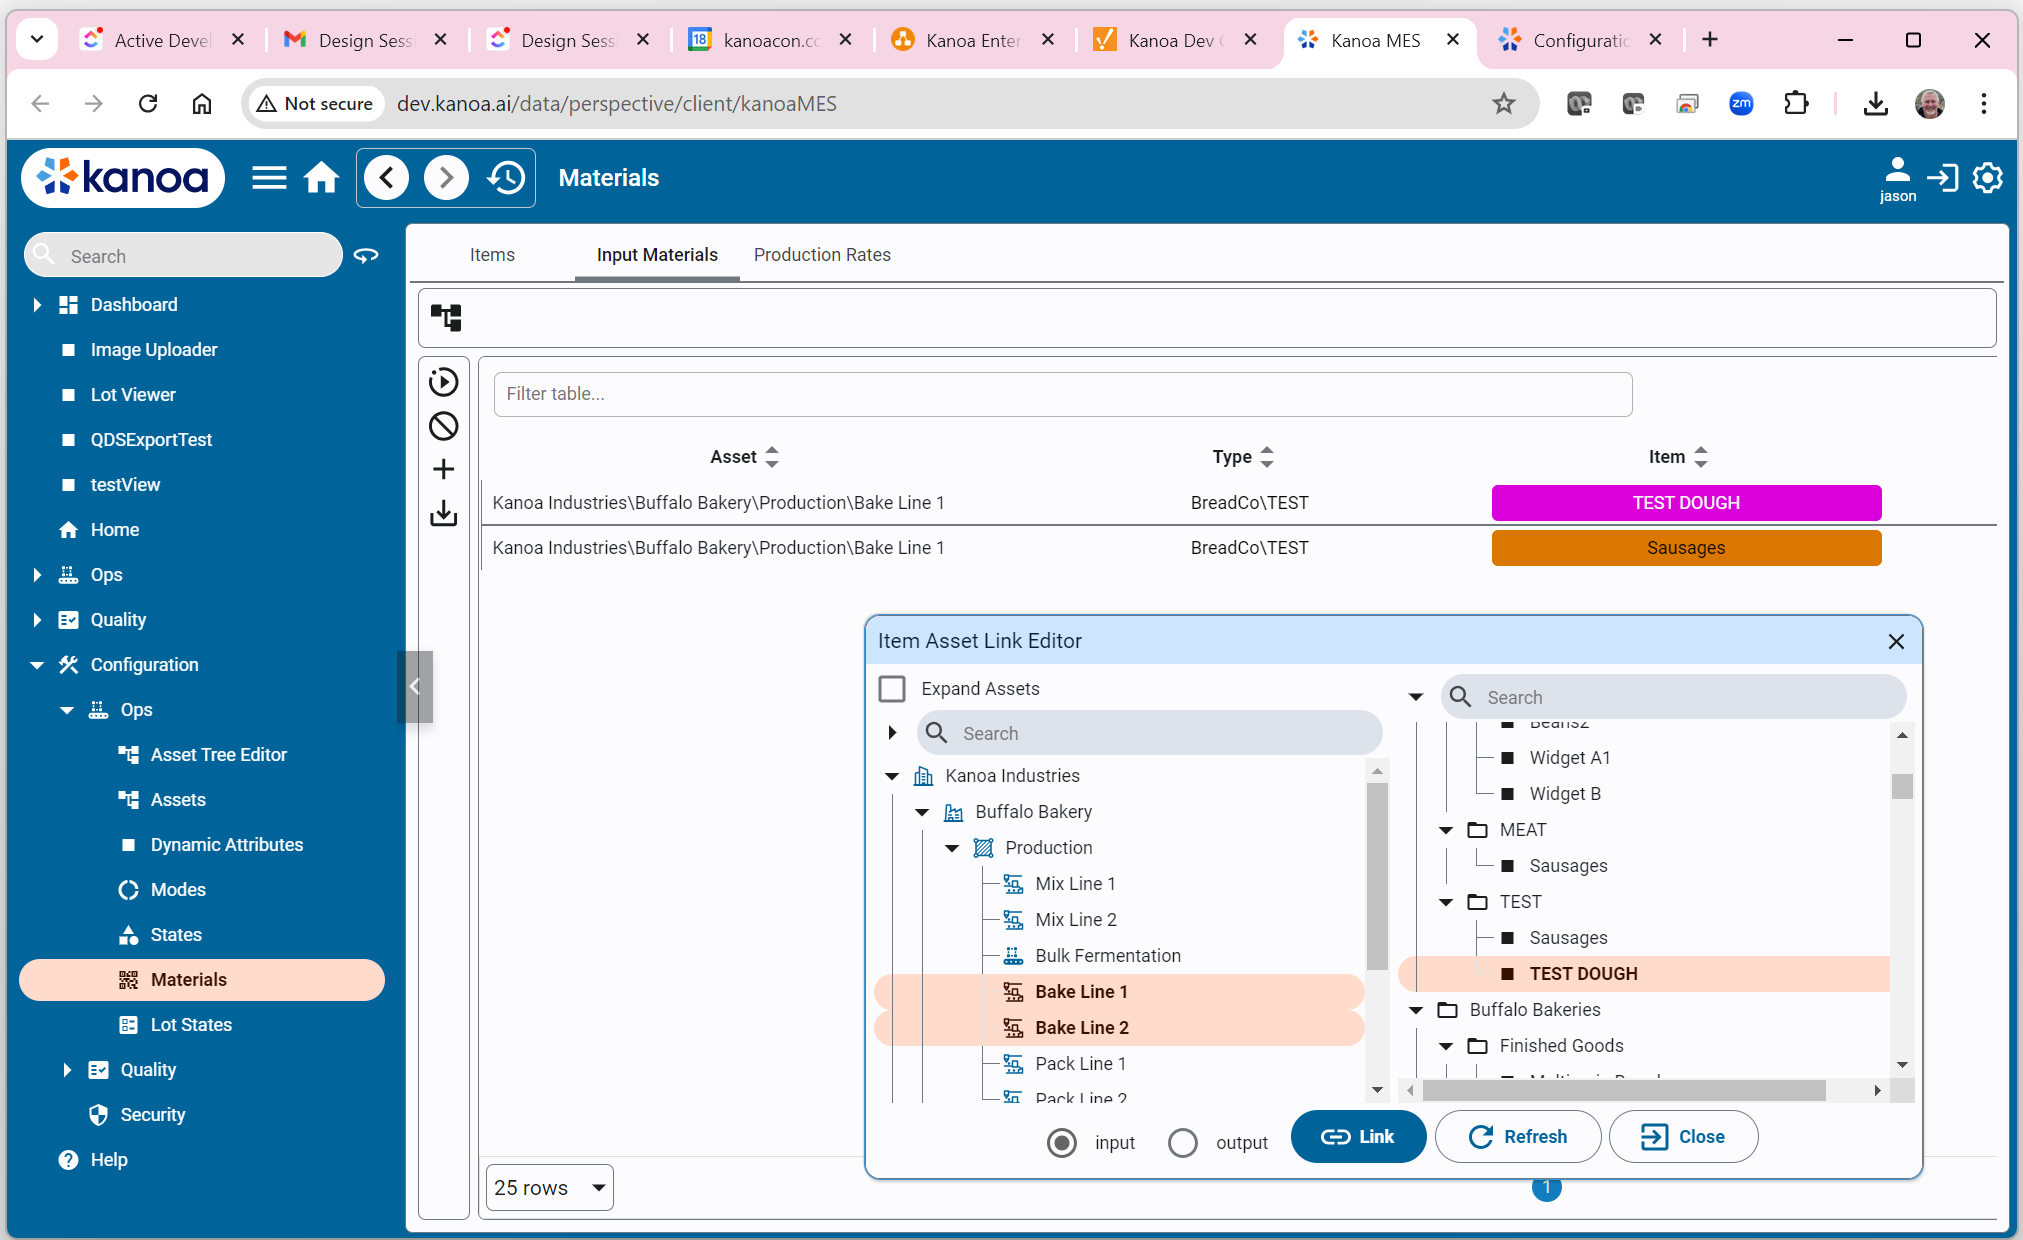
The input materials screen allows you to associate items that can be used as input material with an asset.
Items can be added by clicking on the Material Configuration button or deleted by clicking on the button.
The Item Asset Linker popup is used for both input and output materials, so check the input radio button before linking.

Item Production Rates
The Production Rates tab provides a method for linking which items (products) can be produced on which assets. The Item asset linker popup provides a fast way to link multiple assets with multiple items. Check the 'output' option before linking.
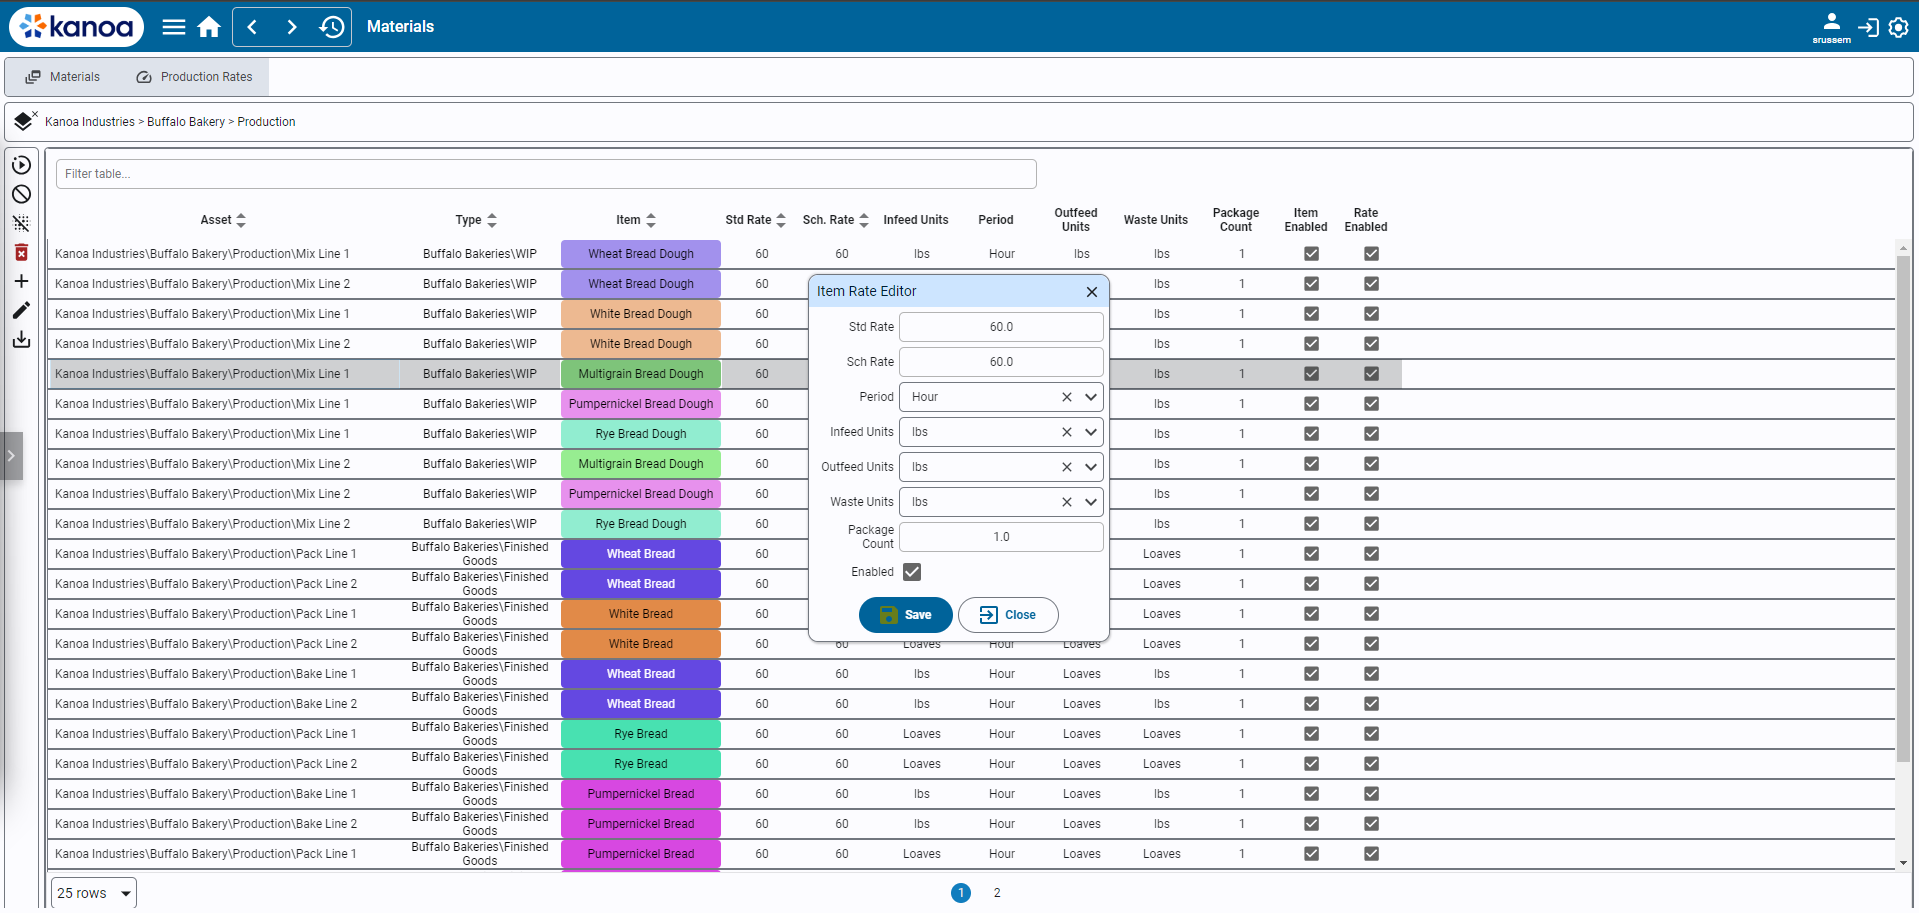
Once you have linked which items can be produced on which assets, you can then edit the production rate information that defines how we determine if an asset is under or over-performing in terms of OEE Performance.

To edit one or more item product rates, click the button.
If you have selected multiple items, you can affect just one field value, such as Std Rate, without affecting any of the other item fields.
This is useful for performing a bulk update to standard rates or units.
Standard Rate: The theoretical or expected speed at which the asset should process material. It uses the infeed units.

In the above example, Bake Line 2 is expected to be able to process 60lbs per hour of the infeed material to make Rye Bread. The Standard Rate drives the OEE Performance calculation and should not be affected by any scrap generated which is why it is measured against lbs processed and not loaves produced.
Sometimes the standard rate set for an item running on an asset may be affected by other external factors such as crew size, inclement weather, moisture content of incoming material. To handle this, the standard rate can be modified and set at the time the asset is in production through the system.kanoa.event.assetOperationChange() system function.
Scheduled Rate: The expected asset rate to process material based on historical OEE data.
In the example above, we would actually expect to process 40lbs per hour due to data supporting the average amount of downtime and scrap generated when running this product on this line. Schedule Rate is used whenever a production order is added to the schedule to automatically determine how long we estimate it will take to complete a production order.
Period: The timeframe for the rate. Can be 'Minute' or 'Hour'. For batch processes where the process time is independent of quantity, such as a chemical reaction time, use 'TOTAL TIME'.
Units: Units designation for infeed, outfeed, and waste.
Package Count: The number of infeed units that equate to the outfeed units. Used to calculate OEE values when no infeed count exists.