Getting Started
Kanoa MES is not just an installable module that you build your application against, but a fully functioning MES application built on top of Ignition that allows for the customization you need. To that end, there are a number of steps required to get set up for the first time. For software trials, Kanoa will set you up with a Docker container you can use to try out our software. Containers make getting started easy. When you are ready to get started, Kanoa will help with the installation and setup of your Ignition gateway. If you'd like to request a container to play with, schedule a call with us here.
In This Section
- System Requirements
- Installation Steps
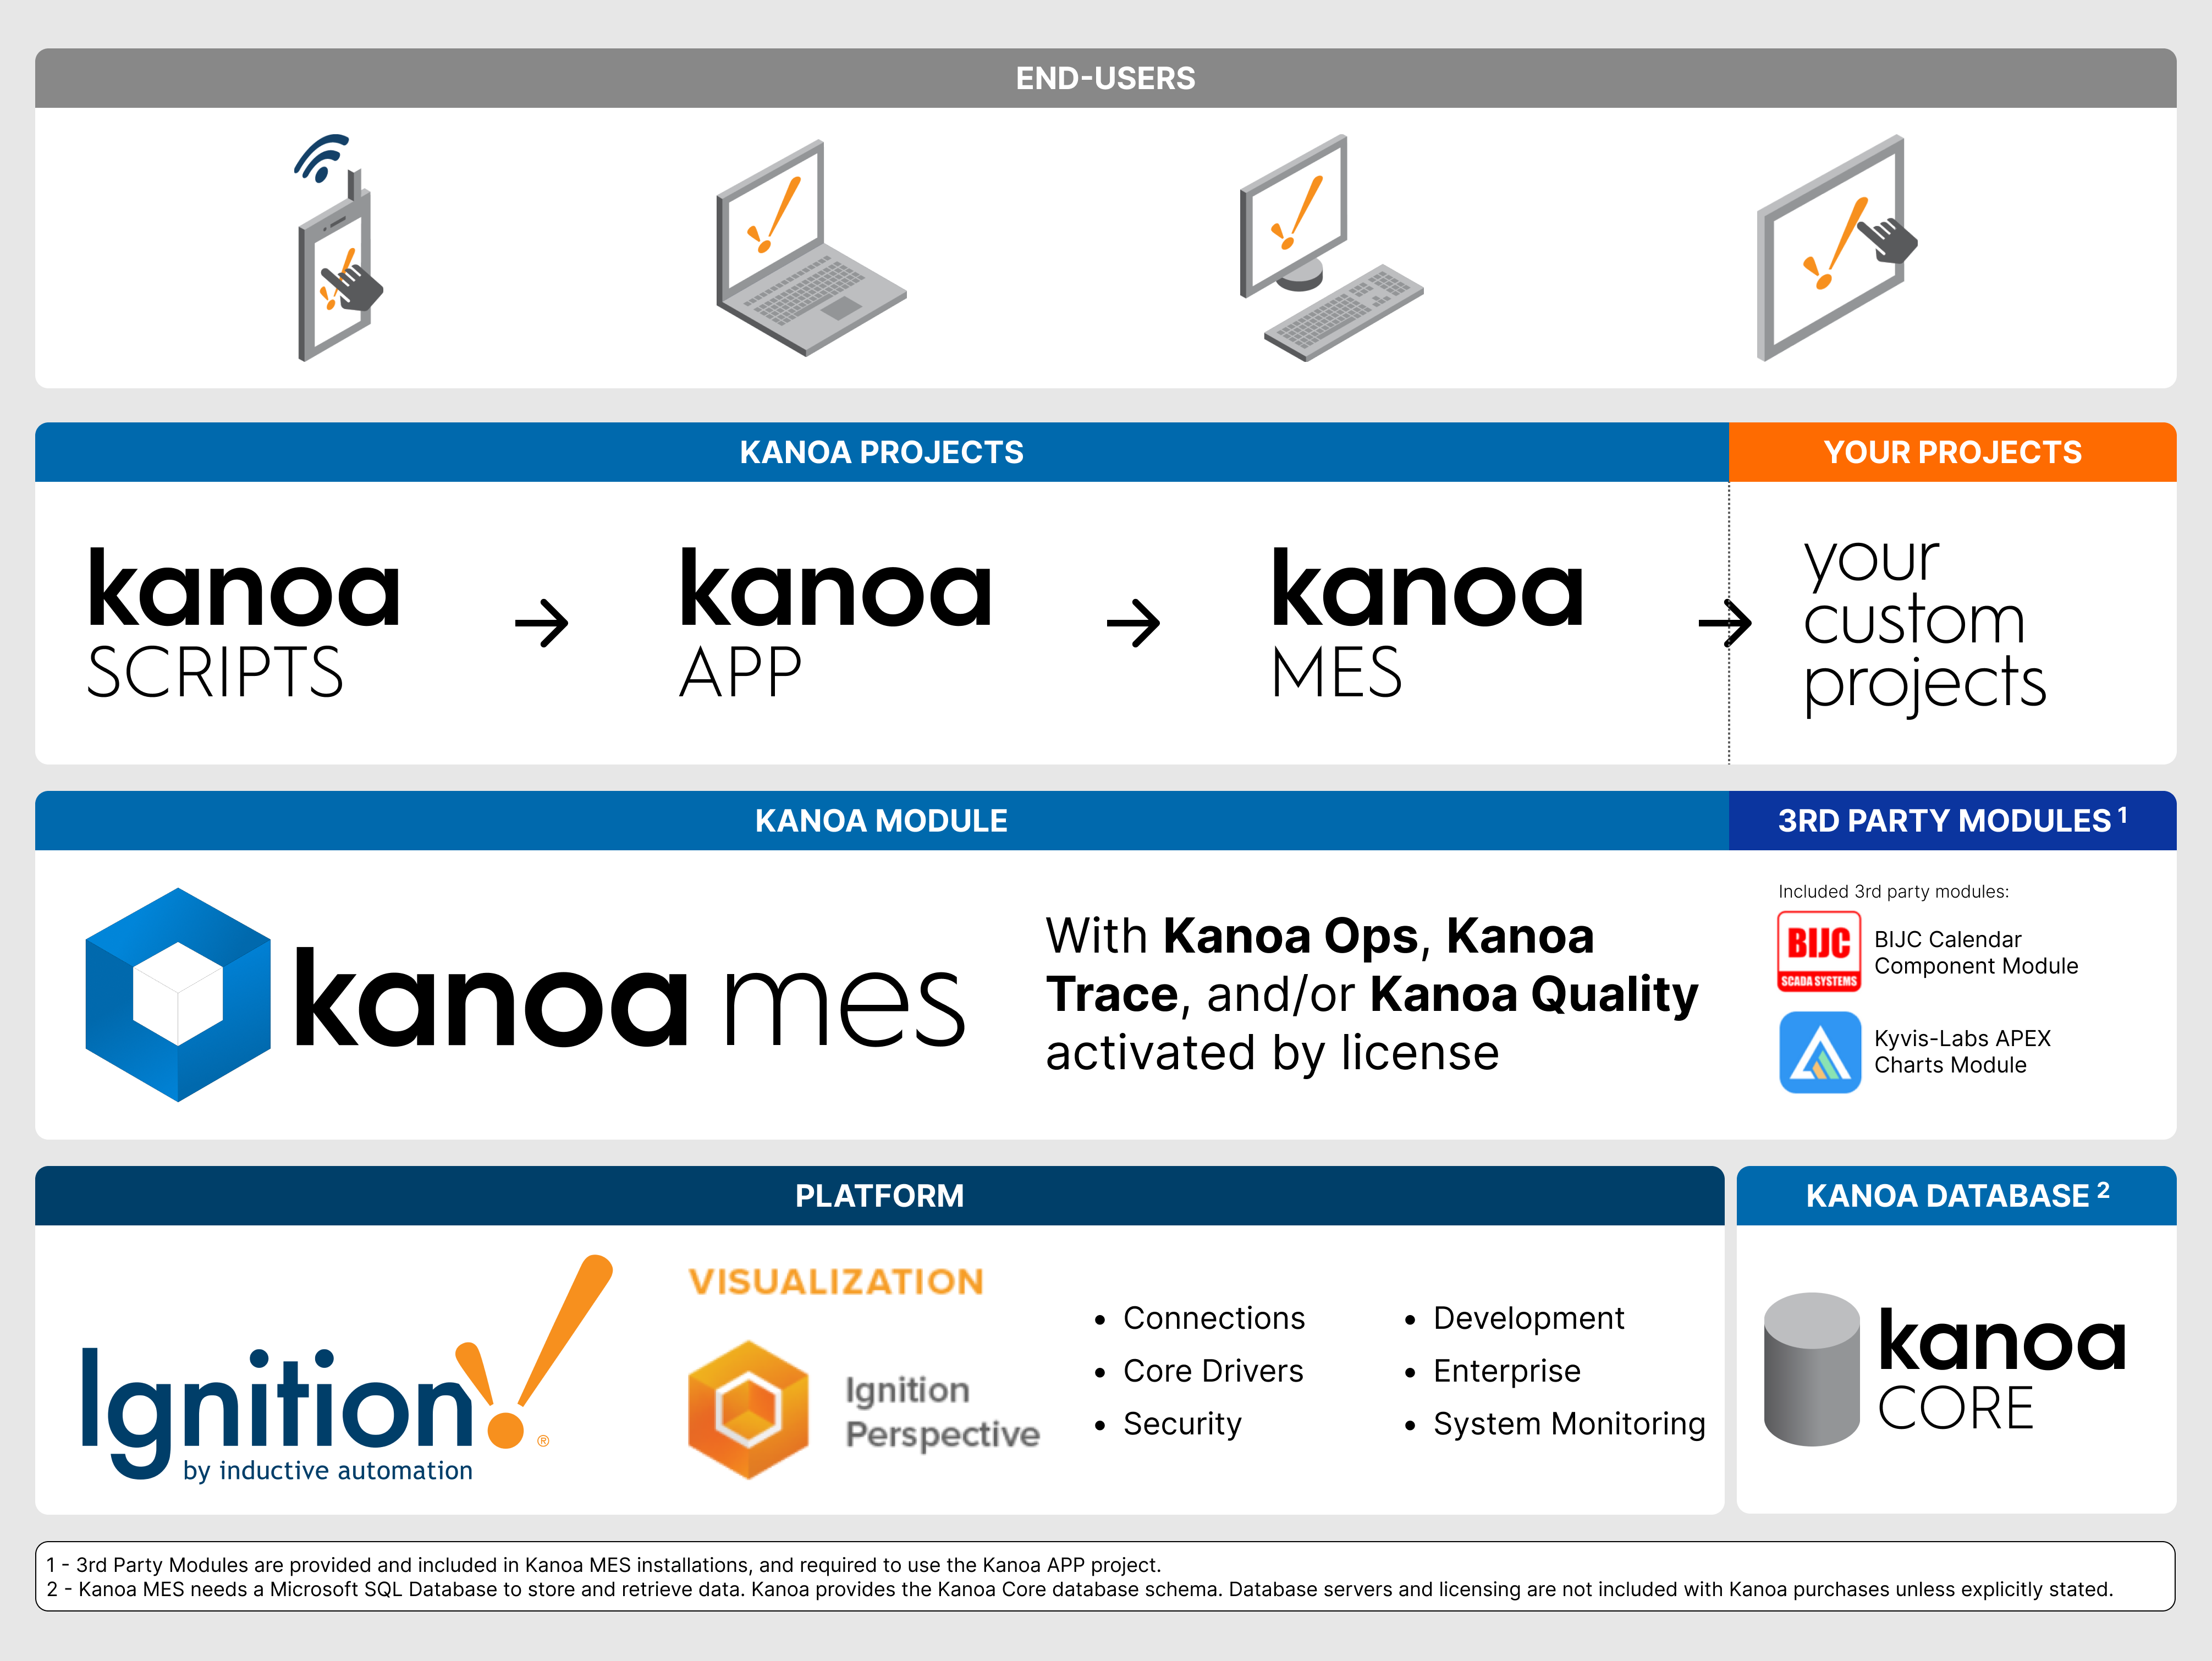
The Kanoa MES solution consists of Ignition modules, projects, tag UDTs and a database schema.

System Requirements
Ignition - Kanoa MES is built on Ignition by Inductive Automation. Kanoa MES always requires Ignition version 8.1+ and the Perspective module. Check our Releases pages for more information on Ignition-Kanoa version compatability. Kanoa is compatable with other modules and solutions in the Ignition ecosystem. You can learn more about Ignition and their modules through the Inductive Automation website.
Hardware - The Ignition Gateway server can be on-premises or in the cloud. It can be a physical or virtual machine. It can be Windows based or Linux. We recommend at least 3 CPU cores and 16 GB of memory.
Database - We require Microsoft SQL Server 2019 (15.0) or later. Follow the recommendations for number of CPUs for SQL and note this will affect the licensing costs for SQL.
Installation Steps
Step 1 - Install Ignition
If you already have an Ignition Gateway installed and ready to go, then you're done. If not, go ahead and download and install Ignition.
Step 2 - Setup the Database Connection
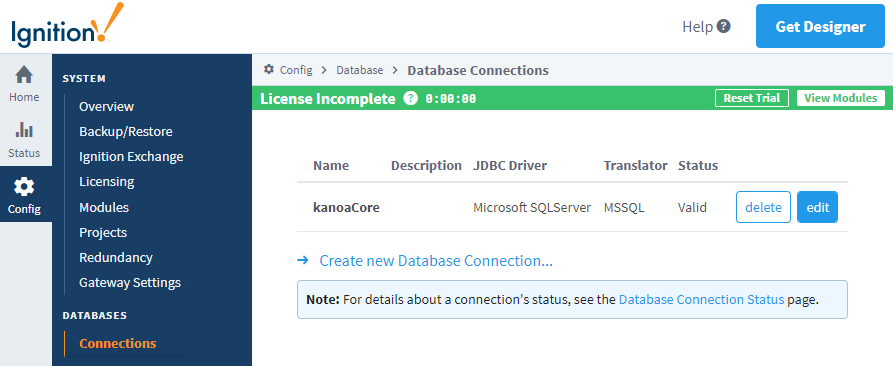
Create a new database connection in the Ignition Gateway and name it kanoaCore. Ignition Help - Connecting to databases

The database connection name must be 'kanoaCore'.
The module installer handles both the creation and updating of the database schema during installation.
Step 3 - Create a New Tag Provider
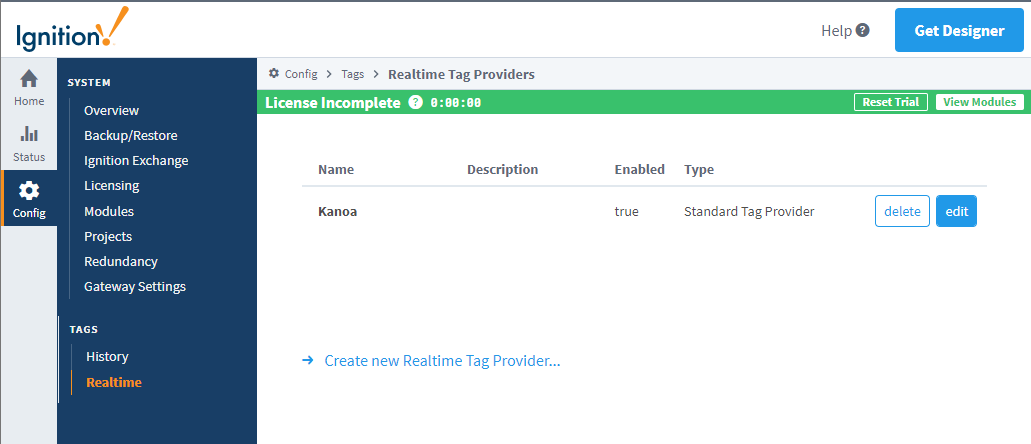
Create a new Standard, Realtime Tag Provider and name it Kanoa. Ignition Help - Tag Providers

This helps keep Kanoa MES data separate from what you may already have in the Ignition Gateway.
Whenever you install or restart the kanoaAPP module, Kanoa will handle installing or updating the tags and tag UDTs as-needed.
Step 4 - Installing the Modules
Kanoa MES and its dependencies can be downloaded here
Installing the modules is done from the Gateway Webpage in the Config > Modules section. IU Install Module Video
Install Kanoa MES and its dependencies in the following order:
- BIJC Calendar Component - Provides a perspective calendar component used for operations and shift scheduling courtesy of BIJC
- Apex Chart - A module containing JavaScript charting library courtesy of Kyvis-Labs
- kanoaMES - Provides all our MES functionality in one module.
The kanoaMES module handles the installation of the kanoa projects. On a clean install, the module will install KANOA_SCRIPTS, kanoaAPP, kanoaMES and kanoaMarquee projects. On module updates to existing systems, only kanoaAPP will ever be updated. The kanoaMES module creates a backup of kanoaAPP whenever it is updated.
The kanoa projects add client customizable scripting and views to the MES application. Projects inherit from one another, so it is important they are installed in a specific order.
KANOA_SCRIPTS
Contains scripts that can be customized specific to the implementation. This project is only ever installed once.
kanoaAPP Contains views for the security, utility and configuration of assets, materials, production orders, shifts, and quality checks as well as data analysis and operator screens. This project is updated alongside our module updates. It can be copied and used as an example, but should never be modified by the client.
kanoaMES
This is the runtime project that contains a link to the home page. Customizations can be added to this project. This project is only ever installed once.
kanoaMarquee
This is the runtime project that links to the dashboard viewer passing parameters in the url to show different dashboards around a plant. This project is only ever installed once. See Marquees & Dashboards for more info.
Step 5 - Configure the Application
The Ignition Gateway is now set up and ready to use. The next steps are configuration...
Recommended Settings
Every implementation is different, some clients have a couple of production lines, some have hundreds. You may only make one product or thousands. Regardless, here are some settings we recommend starting off with...
- Set WebSocket max memory size to 4096.
Perspective views pass data to popups via websockets. If you have a really large number of materials or assets, you'll probably want to increase the max memory setting. This forum post explains how to update the ignition.conf to do this.