Materials
| In This Section | |
|---|---|
| Item Classes | Configure material categories |
| Item Attributes | Add metadata such as recipe info to materials |
| Item Configuration | Create materials |
| Item Classes | Configure material categories |
| Production Rates | Set target production and schedule rates for items running on assets |
| Item States | Link counts with scrap reasons or first pass/rework metadata |
Watch Creating Items Tutorial
The Materials Management page allows you to manage the materials used in the production of your products. Primarily, it is used to define the materials or products that can be produced by your assets and the expected rate at which they should be produced. It can also be used to manage the raw materials that are consumed in the production of sub-assemblies and finished goods.
- Items can be created through this screen, via script functions, web services, or ERP/PLM middleware tables.
- Items can be categorized into classes and sub-classes.
- Custom Attributes can be added to items to store any type of information about an item.
💡 **Note: **The term 'materials' and 'items' are synonymous in KanoaOPS.
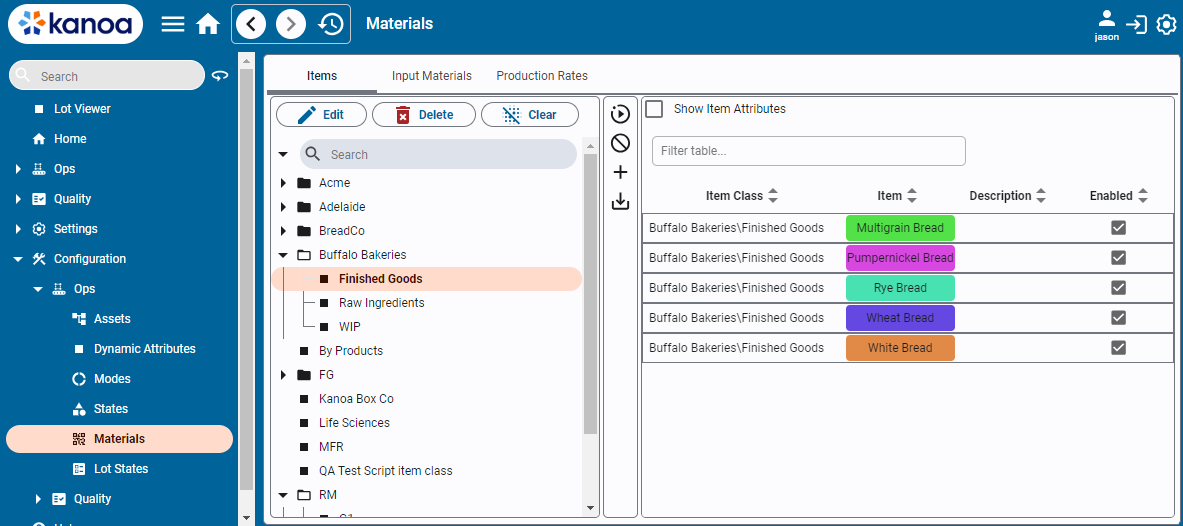
Item Classes
Item Classes are a way of categorizing items. Consider it a folder structure. An important thing to note is that categorizing items can be important particularly with Kanoa Quality as it provides a way to set specifications for an entire item class rather than each individual item.
To edit Item Classes, click the  button.
Item Attributes
Metadata about an item can be stored against an item in the custom attribute tabs. This provides a method for storing any type of data against that item. You can create any attribute by typing its name and selecting 'Create'. Once an attribute has been created, it will be available for other items.
The 'Show Item Attributes' checkbox will add attribute columns to the table.
Configuring Items
Items can be added by clicking on the  button or edited by selecting an item and pressing the button.
Delete an item by clicking on the
button or edited by selecting an item and pressing the button.
Delete an item by clicking on the  button.
💡 Note: Items that have been used in historical production runs cannot be deleted but will be disabled.
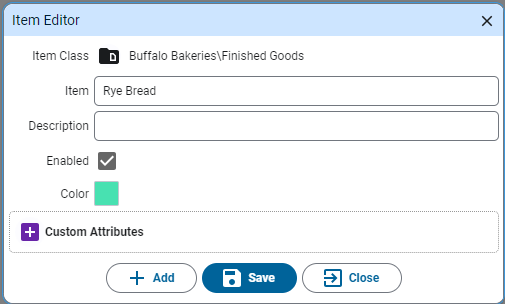
- Item Class: Select the Item Class this item belongs to.
- Item Name: Enter the item name. Item names must be unique.
- Description: Add an optional description about this item.
- Enabled: Indicates if the item is enabled. Disabled items cannot be selected.
- Color: Select a color for this item. Color coding can be useful when scheduling like products together because it can reduce the changeover time between production runs. If no color is selected, the item class color will be shown.